CGDI Prog Benz

Tuesday, June 16, 2020

How to assemble CG MB FBS3 BGA KeylessGo Key & VVDI Benz smart key shell?

Both CG MB FBS3 BGA KeylessGo Key and Xhorse VVDI Benz smart key shell 3 button share the same assembly process.

Assemble Mb Key 01
  1. Open the battery cover and install the battery.
Assemble Mb Key 02

  1. Put into the pcb motherboard of CG MB FBS3 BGA KeylessGo Key.
Assemble Mb Key 03
  1. Close the back cover.
Assemble Mb Key 04 Assemble Mb Key 05

  1. Buckle the metal edge.
Assemble Mb Key 06

  1. Match the key and test whether the key works. Press the remote control button to see if the light is on.
Assemble Mb Key 07

  1. Install the small key clip and spring.
Assemble Mb Key 08

  1. Fit the tail.
Assemble Mb Key 09

  1. Buckle the plastic card.
Assemble Mb Key 10

  1. Install the small key.
Assemble Mb Key 11

  1. The key is assembled and can be used normally.
Assemble Mb Key 12

FBS3 Benz Keyless go
Advanced Quality, High-Class Features
CG Benz Keyless go: CGYS040001
Support cars models:
W221-S series
W216-S series
W164-ML series
W251-R series
W166-ML series
W164-GL series
207 C Series
204 C Series
212 E series
https://www.obdexpress.co.uk/wholesale/mb-fbs3-bga-keylessgo-key-315mhz.html

Tech support: www.obdexpress.co.uk


Source:http://blog.obdexpress.co.uk/2020/06/16/fbs3-bga-keylessgo-key-vvdi-benz-smart-key-shell-assembly-process/

Tuesday, June 2, 2020

How to use CG MB W205 FBS4 to Mileage Reset software filter version (-2018)

Confirmed: CG MB can do W205 FBS4 Mileage Repair for software filter version (-2018).


Do the job on the bench, need:

CGDI MB

USB cable (connected to one computer)

16pin cable (in the package)

Power supply cable

W205 EIS + key

The renew adapter

The ECU

W205 gateway

The dashboard


Procedure:

Download CG MB software, open it and select "Mileage repair", then " FBS4 Mileage Repair - software filter version (-2018)

Connecting the device...

Close "Personal account".


 Cgdi Mb W205 Fbs4 Mileage Programming 001

Follow the operation tips to do.

  1. Click on "Read mileage" button, get the dashboard number and mileage, gateway number, EIS mileage.

the dashboard mileage is : 12345KM.

Cgdi Mb W205 Fbs4 Mileage Programming 002


  1. The writing process varies depending on the dashboard type, "Write" process is to modify the dashboard miles.


  1. Steps to install software filter:

(1). Click on "Read configuration files" (by OBD). It will take 3 minutes.

After succeed, save it into a folder on the desktop.

Cgdi Mb W205 Fbs4 Mileage Programming 003


(2) Remove the cluster from car and connect 12V power to the CGMBvdevice, please do not supply power to the outside of the meter. Connect the mileage repair adapter and cluster then click on "Prepare flash" button (Select the configuration file saved in step 1).


Please refer to this wiring diagram below.

Cgdi Mb W205 Fbs4 Mileage Programming 004


Insert the power adapter to CG MB and meanwhile connect to the renew adapter.

Cgdi Mb W205 Fbs4 Mileage Programming 005


Click on "Prepare Flash".

Choose the " configuration files" that are saved to load.

Programming chip, please wait... until you see "Prepare for FLASH success".

Cgdi Mb W205 Fbs4 Mileage Programming 006


(3) Put the instrument back to the car or platform, check the OBD connection, and click to write the configuration file (select the configuration file saved in step 1).

Cgdi Mb W205 Fbs4 Mileage Programming 007 Cgdi Mb W205 Fbs4 Mileage Programming 008 Cgdi Mb W205 Fbs4 Mileage Programming 009


(4) Write mileage by OBD.

New mileage: 8888km

This operation takes a long time, please connect the power supply or start the car in advance.

Cgdi Mb W205 Fbs4 Mileage Programming 010 Cgdi Mb W205 Fbs4 Mileage Programming 011

Cgdi Mb W205 Fbs4 Mileage Programming 012


(5) Learning cluster to EIS by OBD.

Click on "Learn dashboard to EIS".

Cgdi Mb W205 Fbs4 Mileage Programming 013


(6) Clear the fault code by OBD, please power on the cluster again if the mileage has not changed.

Cgdi Mb W205 Fbs4 Mileage Programming 14

Now the dashboard display 8888KM.


Job is done.


Big thanks to CG MB

 Source:http://www.mileageprogrammer.com/cg-mb-w205-fbs4-mileage-repair-software-filter/


Sunday, May 10, 2020

Welding CGMB CGDI MB Infrared Diode

CGMB Infrared Diode Operation Instructions

Please follow the steps below:
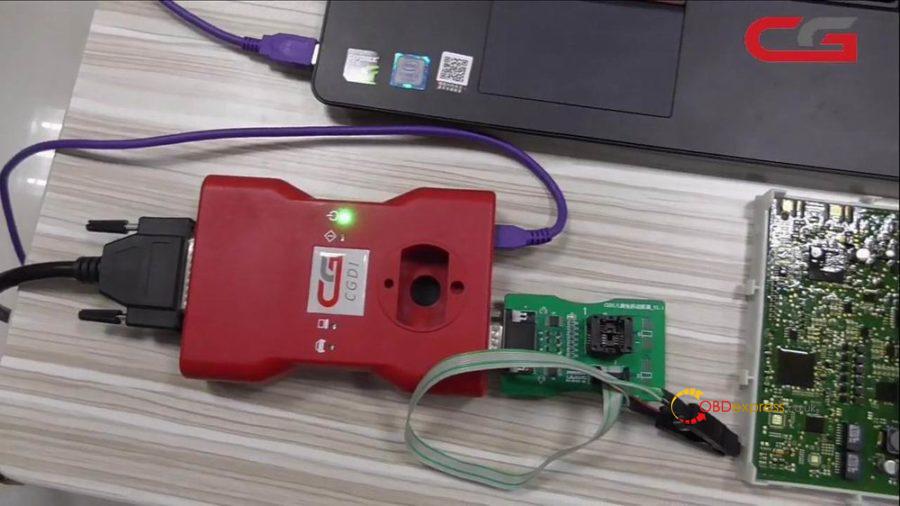
1. Device function check :Before operation,please be sure that the device is in a normal working state that could read key successfully;

Next to disconnect the USB and 12V power supply and ready to disassemble the CGDI MB shell, as shown picture below: (Note: Use a suitable Allen screwdriver, do not use brute force to prevent the screw from sliding, the removed screws are stored)


CGMB-infrared-diode-1


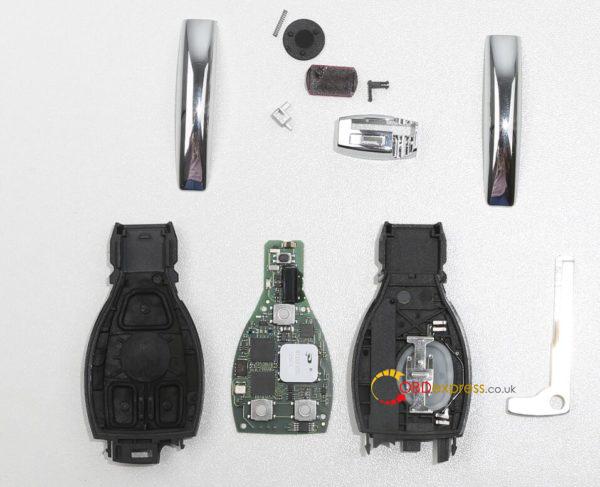
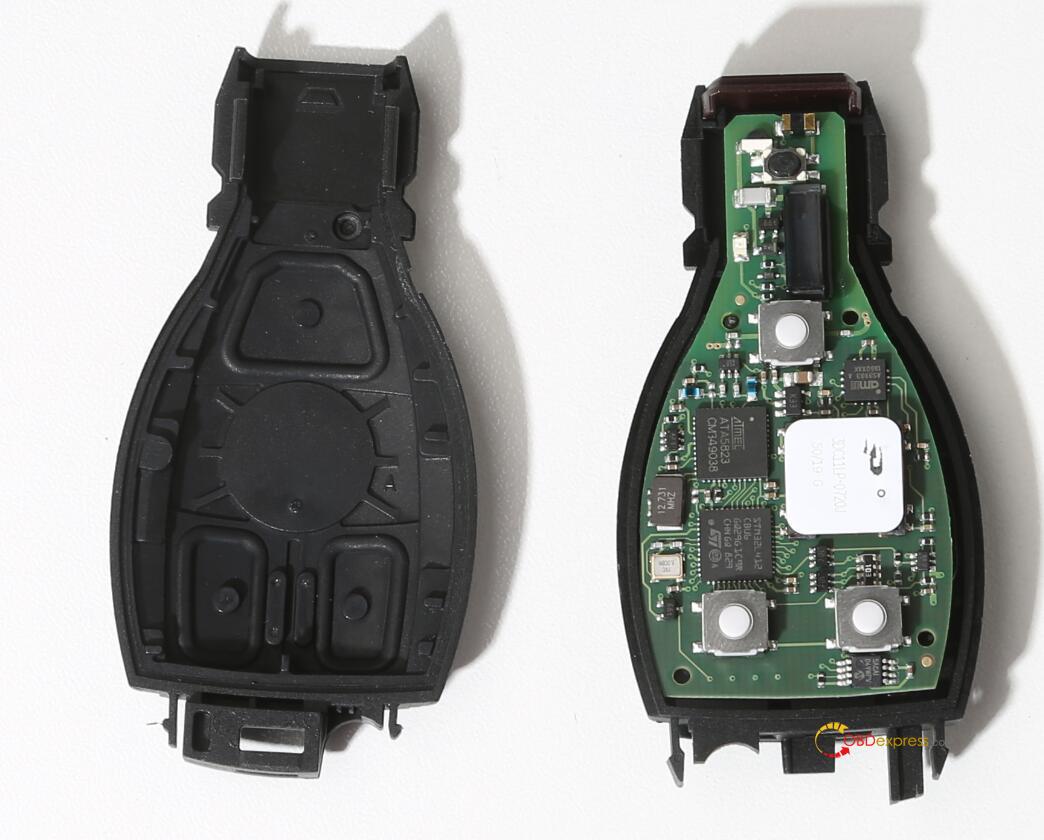
2.Open the enclosure of the device : Open the device shell gently by hand, as shown picture below: (Note: Do not force to open it to prevent the wire of the induction coil from being torn off!)


CGMB CGDI MB Infrared Diode

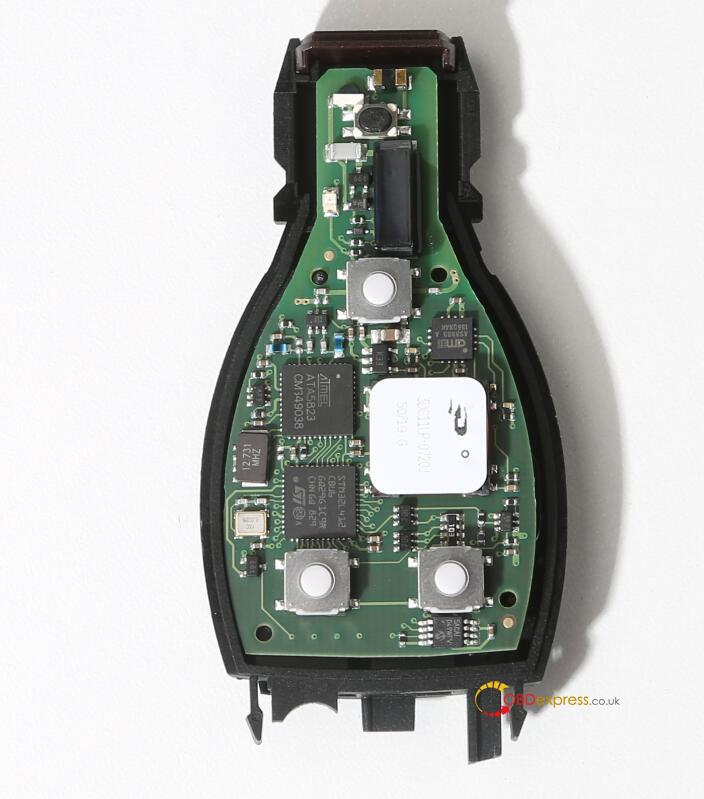
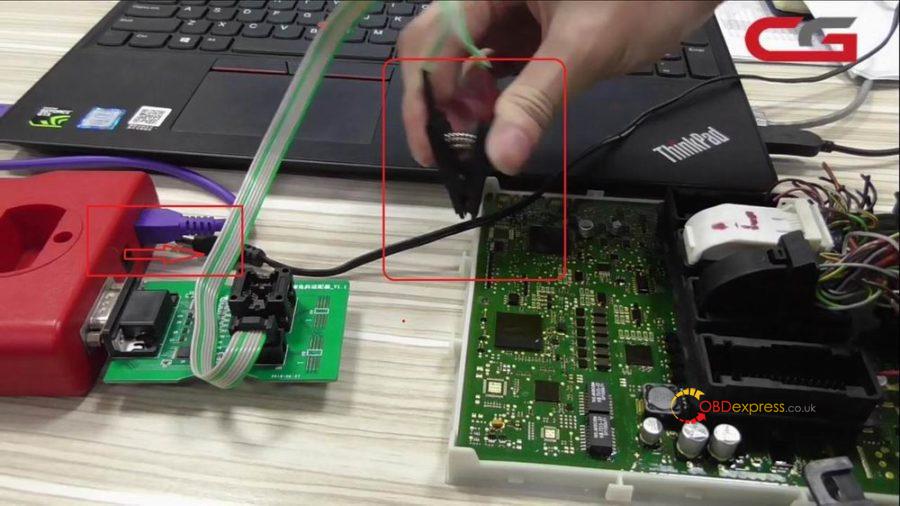
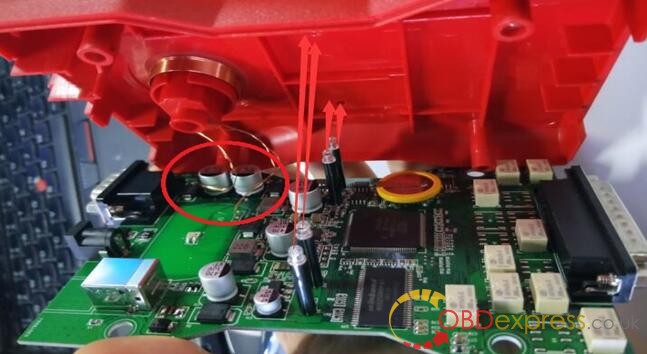
3. Take the original infrared Diode : Use a soldering iron to add tin on both sides of the old infrared device, drag it after heating, and then remove the old infrared device, as shown below: (The temperature of the soldering iron should not be too high, the time should not be too long, to prevent long-term heating damage to the PCB board, certain Welding capacity)


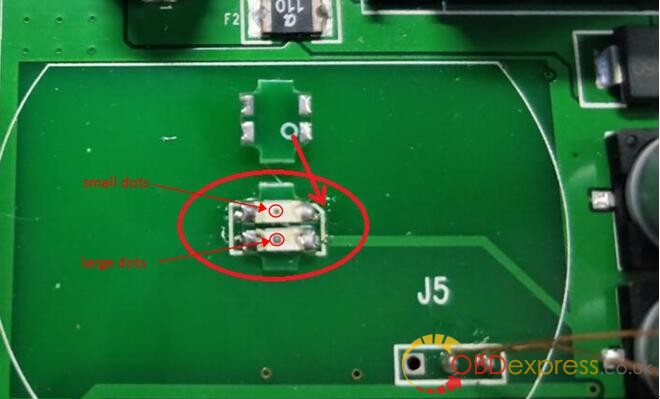
4. Place a new infrared board. Use a soldering iron to flatten the original pad with a soldering iron, and then use tweezers to place the new infrared board on the original pad as shown in the figure, as shown below: (Infrared has a direction, the bottom 1 foot circle is aligned with the missing corner on the PCB Where there are small dots above and large dots below)


CGMB CGDI MB Infrared Diode

5. Weld new infrared board. Hold the new infrared board with tweezers, and solder the four feet with a soldering iron, as shown below: (The temperature of the soldering iron should not be too high, the time should not be too long, to prevent long-term heating damage to the infrared lamp, observe the pins after soldering , There can be no tin short circuit and virtual soldering, and a certain welding capacity is required)
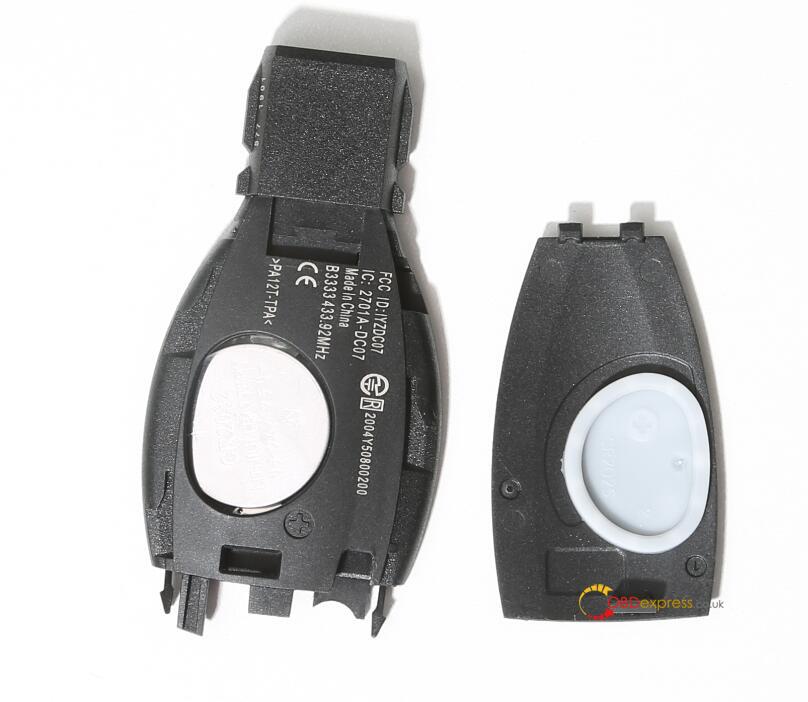

CGMB CGDI MB Infrared Diode


6. Install the top shell. After welding, buckle the upper shell and PCB board, as shown below:

Note: (1) Note that the four indicator LEDs must be aligned with the holes;

(2) The wires of the induction coil should be arranged well, and cannot fall into the infrared        induction area to prevent it from blocking the infrared transceiver;

(3) Do not use brute force to buckle the shell, you must confirm the two steps above and then   close the cover.
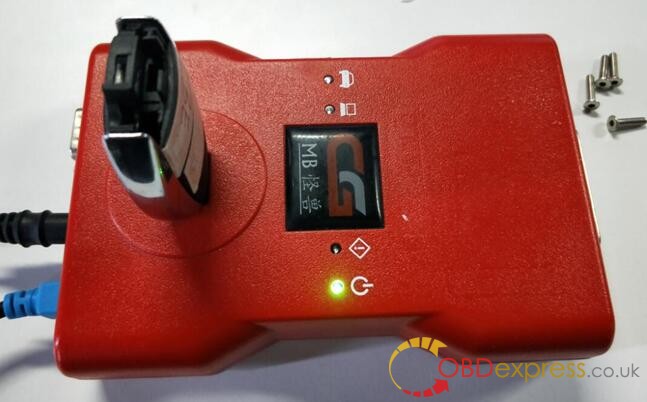
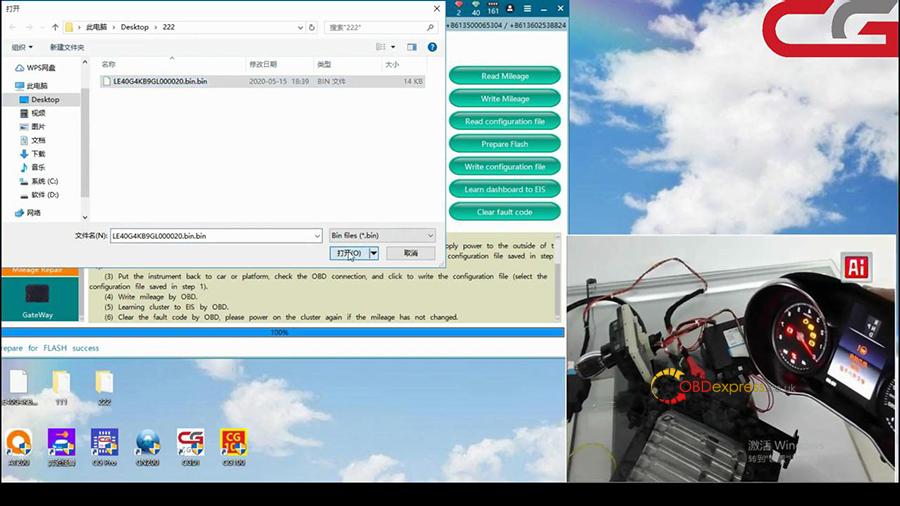
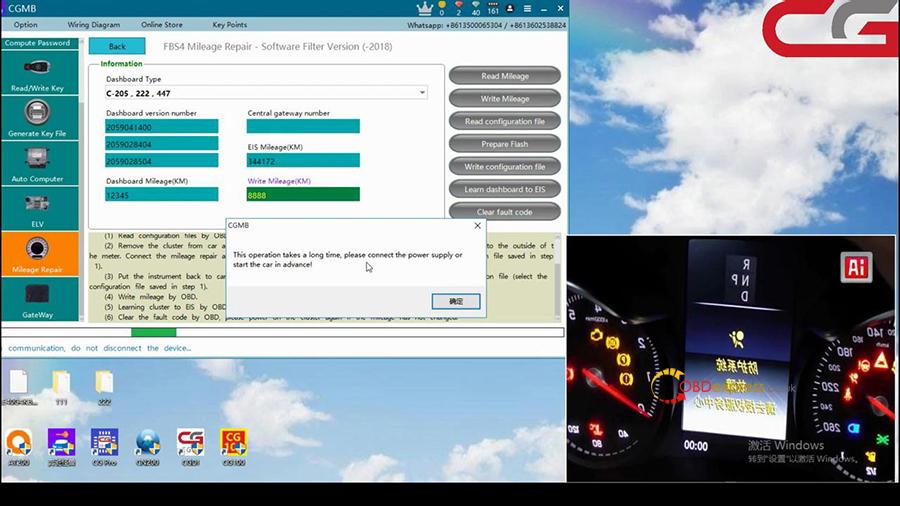
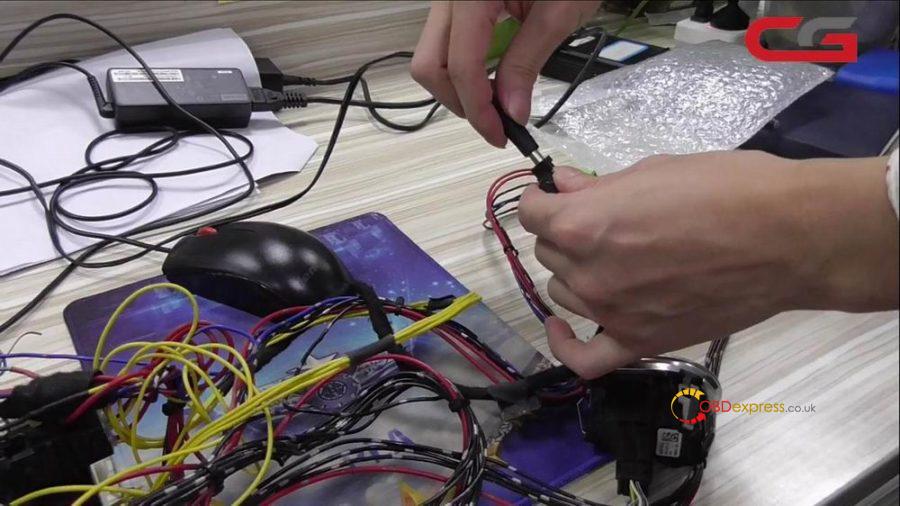
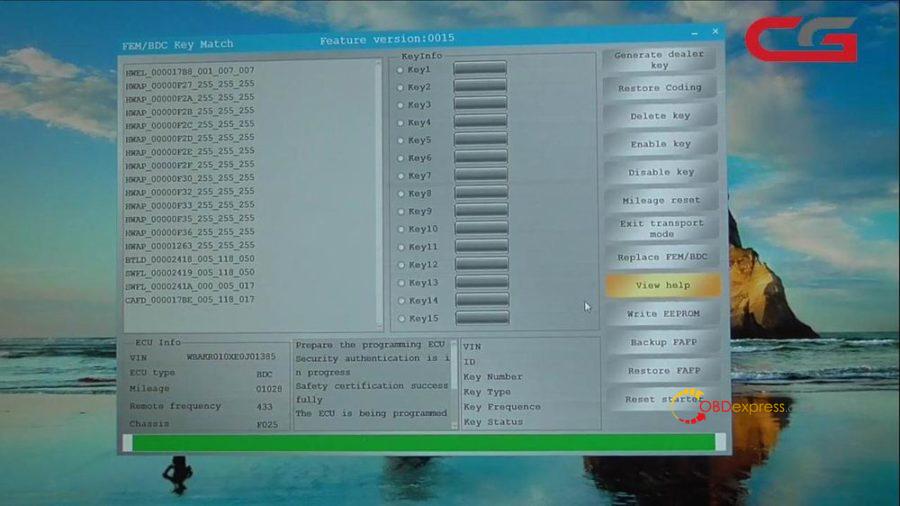

CGMB CGDI MB Infrared Diode

7. Test function : Please do not tighten the screws after closing the cover. At this time need to plug USB and 12V to read a key with all direction. If software shows that read successfully,then you could start to tighten screws .As shown in the figure below: (Do not tighten the screws before the reading is successful)


CGMB CGDI MB Infrared Diode


8. Install the bottom case : Put the four previously removed screws into the back shell and tighten with a screwdriver. The replacement operation is all completed! As shown below:


CGMB CGDI MB Infrared Diode


Thursday, April 2, 2020

How to change 2014 BMW X5 mileage by CG PRO and CGDI BMW

Look at the original 2014 BMW X5 car with 101024KM mileage.
Cg Pro Cgdi Bmw Adjust 2014 Bmw X5 Mileage 01 Cg Pro Cgdi Bmw Adjust 2014 Bmw X5 Mileage 02

Purpose: adjust the mileage to 73000KM on Bench, BDC module with 160D chip.

Mileage programmer to use:
CG Pro (used to adjust the mileage on the dashboard)
+
CGDI BMW programmer (used to adjust the mileage in the BDC module)

Procedure:
  1. Remove the car procedure.
Remove the BDC module.
Cg Pro Cgdi Bmw Adjust 2014 Bmw X5 Mileage 03

Dismantle the instrument module.
Cg Pro Cgdi Bmw Adjust 2014 Bmw X5 Mileage 04

The chip is 160D.
Cg Pro Cgdi Bmw Adjust 2014 Bmw X5 Mileage 05

  1. We first process the car instrument module, and adjust the mileage to the required number with CG Pro.

Open CG Pro, select "Dashboard -> BMW -> 160DQ (mode 1) -> Read".
Cg Pro Cgdi Bmw Adjust 2014 Bmw X5 Mileage 06 Cg Pro Cgdi Bmw Adjust 2014 Bmw X5 Mileage 07 Cg Pro Cgdi Bmw Adjust 2014 Bmw X5 Mileage 08 Cg Pro Cgdi Bmw Adjust 2014 Bmw X5 Mileage 09

Click on "101024 KM ", then enter 73000, and click on "OK".
Cg Pro Cgdi Bmw Adjust 2014 Bmw X5 Mileage 10 Cg Pro Cgdi Bmw Adjust 2014 Bmw X5 Mileage 11 Cg Pro Cgdi Bmw Adjust 2014 Bmw X5 Mileage 12

One more time, click on "Read", you will have new 72992KM.
Save file.
Cg Pro Cgdi Bmw Adjust 2014 Bmw X5 Mileage 13 Cg Pro Cgdi Bmw Adjust 2014 Bmw X5 Mileage 14 Cg Pro Cgdi Bmw Adjust 2014 Bmw X5 Mileage 15

  1. Process the BDC module with CGDI BMW
There are 95256 chips on the BDC, please clean them, they will be used during operation.
Cg Pro Cgdi Bmw Adjust 2014 Bmw X5 Mileage 16 Cg Pro Cgdi Bmw Adjust 2014 Bmw X5 Mileage 17 Cg Pro Cgdi Bmw Adjust 2014 Bmw X5 Mileage 18

Connect the BDC to the platform, follow the on-screen instructions in the CGDI BMW programmer.
Cg Pro Cgdi Bmw Adjust 2014 Bmw X5 Mileage 19 Cg Pro Cgdi Bmw Adjust 2014 Bmw X5 Mileage 20

Open CGDI BMW, click on "BMW Key Match (OBD)".
Cg Pro Cgdi Bmw Adjust 2014 Bmw X5 Mileage 21

FEM /BDC Key Match.
Cg Pro Cgdi Bmw Adjust 2014 Bmw X5 Mileage 22

Read the prompt and click on "Yes".
Cg Pro Cgdi Bmw Adjust 2014 Bmw X5 Mileage 23

Select "2. Use EEPROM adapter to read FEM /BDC 8-pin chip data: please remove the FEM /BDC from the car (must cut off power). and properly connect the adapter's chip clip to the 95128/95256 chip of the FEM /BDC, then click the "Next" button.
Cg Pro Cgdi Bmw Adjust 2014 Bmw X5 Mileage 24 Cg Pro Cgdi Bmw Adjust 2014 Bmw X5 Mileage 25 Cg Pro Cgdi Bmw Adjust 2014 Bmw X5 Mileage 26 Cg Pro Cgdi Bmw Adjust 2014 Bmw X5 Mileage 27

Install the FEM /BDC into the car (The chip holder must be removed from the chip) and click the "Next" button.
Cg Pro Cgdi Bmw Adjust 2014 Bmw X5 Mileage 28 Cg Pro Cgdi Bmw Adjust 2014 Bmw X5 Mileage 29 Cg Pro Cgdi Bmw Adjust 2014 Bmw X5 Mileage 30 Cg Pro Cgdi Bmw Adjust 2014 Bmw X5 Mileage 31 Cg Pro Cgdi Bmw Adjust 2014 Bmw X5 Mileage 32

Again, Select "2..." to follow it to do.
Cg Pro Cgdi Bmw Adjust 2014 Bmw X5 Mileage 33 Cg Pro Cgdi Bmw Adjust 2014 Bmw X5 Mileage 34

If failed, please try again.
Cg Pro Cgdi Bmw Adjust 2014 Bmw X5 Mileage 35 Cg Pro Cgdi Bmw Adjust 2014 Bmw X5 Mileage 36

Code setting succeed.
Cg Pro Cgdi Bmw Adjust 2014 Bmw X5 Mileage 37

Click on "Mileage reset".
The car mileage will be restored to 0.
Reset mileage successfully.
Cg Pro Cgdi Bmw Adjust 2014 Bmw X5 Mileage 38 Cg Pro Cgdi Bmw Adjust 2014 Bmw X5 Mileage 39 Cg Pro Cgdi Bmw Adjust 2014 Bmw X5 Mileage 40
The instrument and BDC were successfully adjusted. Now the mileage we need is displayed.
Cg Pro Cgdi Bmw Adjust 2014 Bmw X5 Mileage 41

Good day!

www.obdexpress.co.uk


Source:http://blog.obdexpress.co.uk/2020/04/02/how-to-adjust-2014-bmw-x5-mileage-by-cg-pro-cgdi-bmw/

How to assemble CG MB FBS3 BGA KeylessGo Key & VVDI Benz smart key shell?

Both CG MB FBS3 BGA KeylessGo Key and Xhorse VVDI Benz smart key shell 3 button share the same assembly process. Open the battery cove...